Flashing
The Flashing window lets you configure a custom command used to flash your firmware directly from MCUViewer. Open it by selecting Options -> Flashing from the top menu.
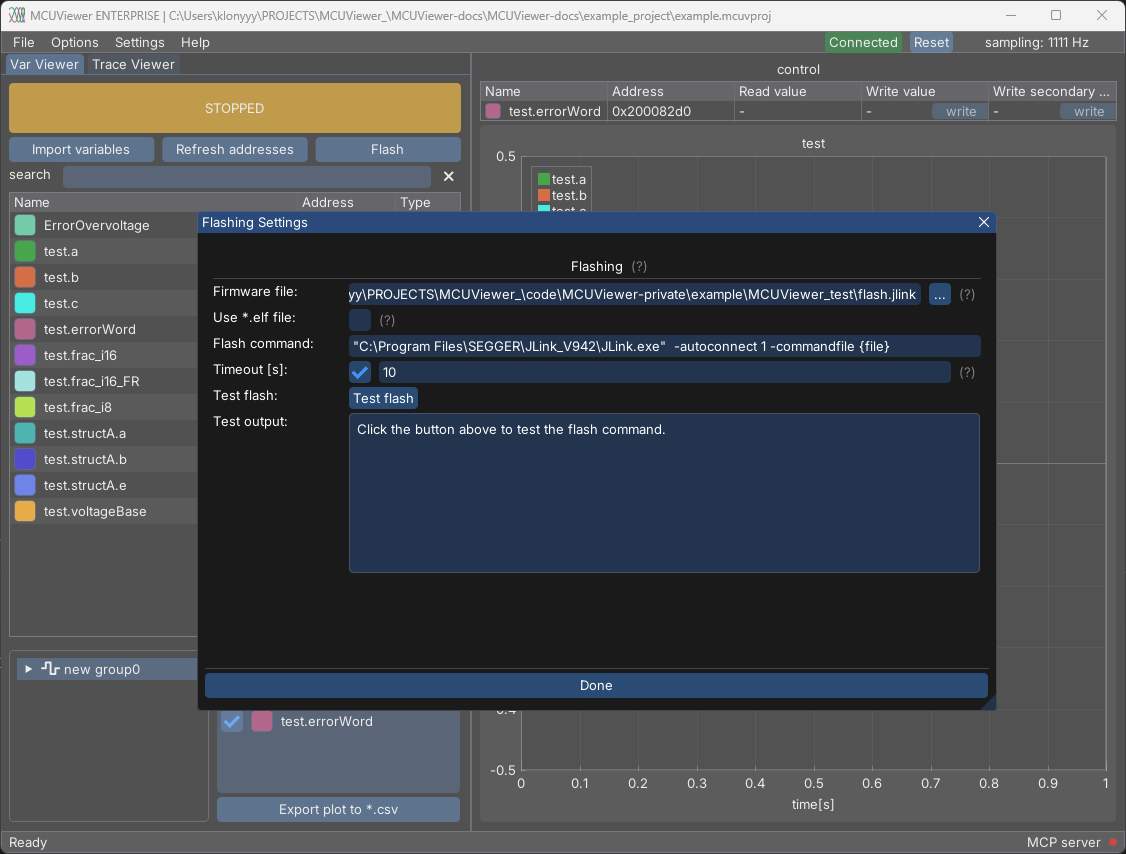
Firmware file- path to the firmware file used by the flash command. Click the...button to browse for a file. Disabled whenUse *.elf fileis checked.Use *.elf file- when checked, the{file}macro in the flash command is replaced with the *.elf file path set inOptions -> Acquisitioninstead of theFirmware filefield.Flash command- the command line used to flash the firmware. Use the{file}macro anywhere in the command - it will be replaced with the firmware file (or *.elf file) path.
For example, for a JLink probe:
"C:\Program Files\SEGGER\JLink_V942\JLink.exe" -autoconnect 1 -commandfile {file}or STLink probe:
STM32_Programmer_CLI -c port=SWD freq=4000 -w {file} -v -rstTimeout [s]- when checked, the flash command is aborted automatically if there is no output for the specified number of seconds (1-3600). When unchecked, a default timeout of 15 seconds is used.Test flash- runs the flash command immediately from within the Flashing window, so you can verify it works correctly before closing the settings. The live output is displayed in theTest outputbox below. This button is disabled while the acquisition is running.
Flashing from the main window
Once a flash command is configured, a Flash button becomes active on the main toolbar next to Import variables and Refresh addresses. Clicking it stops and disconnects the current acquisition (if running) and runs the configured flash command. The command output is shown in a popup window once flashing completes.